🎧 Listen to this article

Listen to the complete audio version, with exclusive commentary on every technique, and save time.

Chapters

  • 00:00Introduction
  • 00:45Paddle grip & posture
  • 02:30Forward Stroke
  • 03:30Sweep & Draw Stroke
  • 04:30Low Brace — balance
  • 05:05Conclusion
Show complete transcript

Introduction — Welcome to this audio guide to kayak paddling techniques. Whether you are a beginner or want to consolidate your basics, this guide takes you through it step by step.

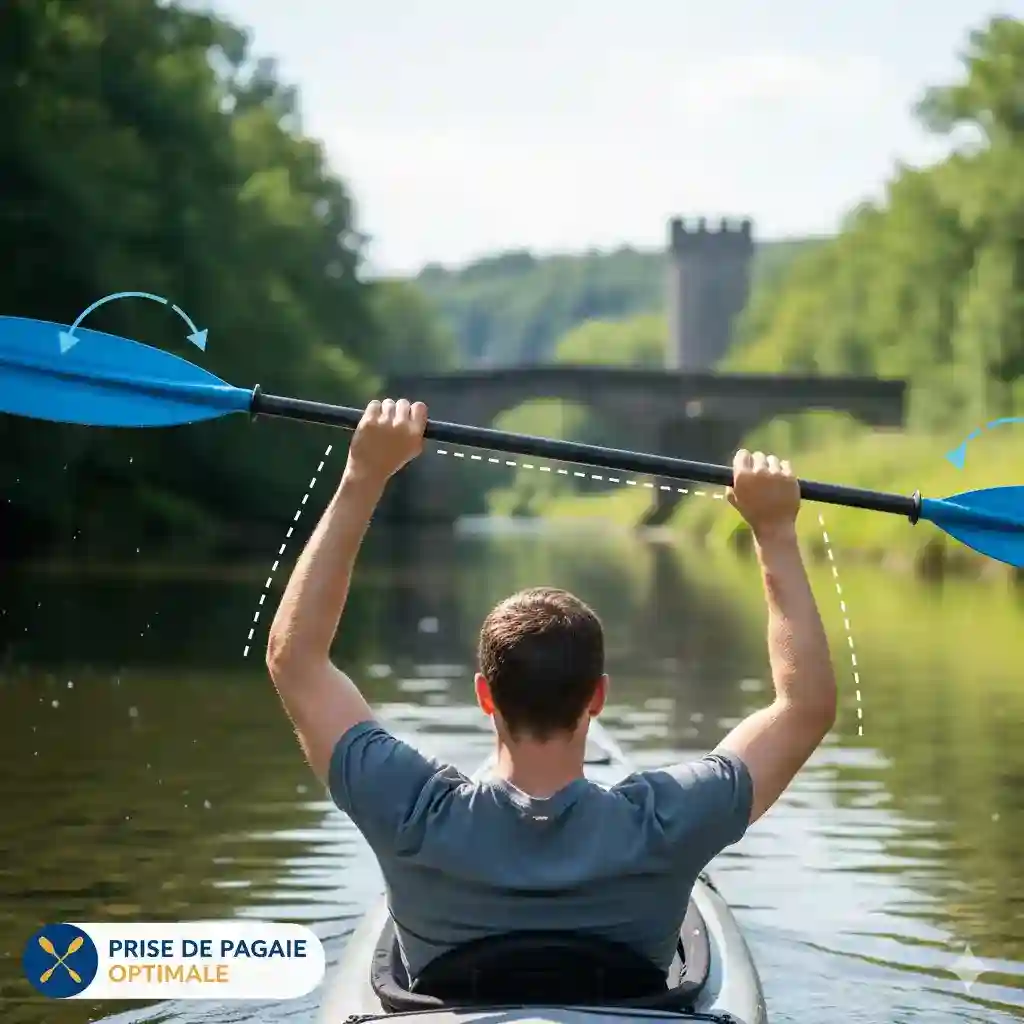
The paddle grip — Hold the paddle above your head with your elbows at 90° to find the ideal spacing between your hands. The blade's hollow face, the power face, should face you. Make an O with your thumb and index finger, and keep your wrists straight to prevent tendinitis.

The 3-point posture — Keep your back straight, knees touching the sides of the cockpit and feet on the footrests. Through this triangle of contact your hips pass the power of your body on to the kayak.

The Forward Stroke — The power comes from rotating the torso, not from the arms. Catch phase: plant the blade well forward. Power phase: rotate your torso. Exit phase: take the blade out at hip level.

Sweep Stroke and Draw Stroke — To turn, draw a wide arc (sweep stroke) on the side opposite to your direction. To move sideways, plant the blade vertically and pull it toward your hip (draw stroke).

The Low Brace — The anti-capsize reflex: slap the water with the back of the blade, elbows high, while giving a strong hip snap on the opposite side at the same time. Never let go of your paddle.

Conclusion — On calm water you can learn these fundamentals in 30 to 60 minutes. Practice each movement on its own before linking them naturally.
1. Equipment and Posture

Comfort, control and power all start with the right setup, before you even paddle.

The Paddle Grip

A correct grip transfers power efficiently and prevents fatigue.

Hand Spacing

Raise the paddle above your head with elbows at 90°: this spacing becomes your ideal reference.

Blade Orientation

The hollow face (power face) must face you. With asymmetrical blades, the longer part goes on top.

Relaxed Grip

Make an "O" with your thumb and index finger and let the other fingers rest on the shaft. Keep your wrists straight to avoid tendinitis.

Good kayak posture: 3-point contact seat–knees–footrests

Posture: 3-Point Contact

Keep your back straight, knees pressed against the sides of the cockpit and feet on the footrests. This contact triangle lets you steer the kayak with your hips and prevents numbness.

Seat Knees Footrests

2. Essential Maneuvers

Propulsion, braking, turning and lateral movement: select a maneuver to see the detailed explanation.

3. Balance and Safety

Good balance is dynamic rather than static. Stay relaxed and learn to react with your paddle.

The Low Brace

This is your number one safety reflex. If you feel the kayak tipping, do not tense up: lean into the fall and use your paddle.

  • 1
    Action: Slap the surface of the water quickly with the back of your blade. Keep elbows high and the shaft low against your torso.
  • 2
    Reaction: Simultaneously, give a strong hip snap on the opposite side to bring the boat upright again.
  • 3
    Most importantly: Never let go of your paddle: it is your permanent outrigger.

Hover = demonstration

Tipping kayak
Stabilized!

Frequently Asked Questions

Is it difficult to learn how to kayak?

▾
You can pick up the basics (propulsion, braking and elementary turning) in 30 minutes to 1 hour on calm water. Moving on to advanced techniques such as the Eskimo roll or whitewater navigation takes more practice with a certified instructor.

How does a kayak differ from a canoe?

▾
You kayak seated with your legs extended in a closed cockpit, using a double-bladed paddle (one blade on each side). You canoe kneeling or on a bench in an open boat, using a single-bladed paddle.

How do you avoid capsizing in a kayak?

▾
Three rules: (1) adopt the 3-point posture (seat, knees, footrests); (2) stay relaxed, since a rigid body amplifies imbalance; (3) master the low brace and the kayak comes upright again in a fraction of a second.

How do you keep a kayak paddling in a straight line?

▾
Alternate symmetrical strokes on each side, take the blade out before it passes your hip, and correct with slight sweep strokes instead of altering your trajectory at every stroke. A long kayak is naturally more stable in a straight line.

What is the Eskimo roll in kayaking?

▾
After a capsize, the Eskimo roll lets you right yourself without leaving the cockpit: a coordinated movement of the hips and a paddle brace bring the kayaker back upright. It must imperatively be learned in a pool with a certified instructor.

How do you hold a kayak paddle correctly?

▾
Place your hands shoulder-width apart + 10 cm (check with elbows at 90° above the head). Make an O with your thumb and index finger, straight wrists — a tense grip tires the forearms and causes tendinitis.

Google Reviews

Recommended Business
4.6
Based on 1,282 reviews